Renault Clio: Parking brake lever: Removal - Refitting
REMOVAL
I - REMOVAL PREPARATION OPERATION
- Disconnect the battery (see Battery: Removal - Refitting) (MR 392, 80A, Battery).
- Remove the centre console (see Centre console: Removal - Refitting) (MR 393, 57A, Interior equipment).
II - OPERATION FOR REMOVAL OF PART CONCERNED

- Disconnect the parking brake lever switch (1).
- Loosen the adjusting nut (2) for the parking brake cables enough to be able to remove the parking brake cables.
- Remove the parking brake cables (3).
- Remove:
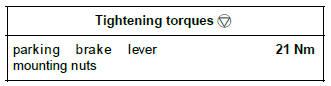
- the parking brake lever mounting nuts (4),
- the parking brake lever.
REFITTING
I - REFITTING OPERATION FOR PART CONCERNED
- Refit:
- the parking brake lever,
- the nuts securing the parking brake lever.
- Torque tighten the parking brake lever mounting nuts (21 Nm).
- Refit the parking brake cables into their housing.
- Connect the switch on the parking brake lever.
- Adjust the parking brake cables (see 37A, Mechanical component controls, Parking brake lever: Adjustment, 37A-90).
II - FINAL OPERATION.
- Refit the centre console (see Centre console: Removal - Refitting) (MR 393, 57A, Interior equipment).
- Connect the battery (see Battery: Removal - Refitting) (MR 392, 80A, Battery).
Parking brake lever: Adjustment
A poorly adjusted parking brake:
- prevents correct operation of the automatic compensation system for the brake shoes,
- causes premature wear of brake shoes.
ADJUSTMENT
I - ADJUSTMENT PREPARATION OPERATION
- Position the vehicle on a two-post lift (see Vehicle: Towing and lifting).
- Apply the parking brake five times to condition the cables for normal use.
- Put the parking brake lever into the released position.
- Check that the rear wheels turn freely. If they do not,
check the following components and if necessary repair:
- the parking brake cables,
- the calliper piston,
- the automatic compensation system,
- calliper
- Remove the rear wheels (see 35A, Wheels and tyres, Wheel: Removal - Refitting, 35A-1).
- Remove the centre console (see Centre console: Removal - Refitting).
II - OPERATION FOR ADJUSTMENT OF PART CONCERNED

- Loosen the nut (1) to release the cables.
- Position the parking brake lever at the 2nd notch.
- Move the adjustment nut until the disc or drum can no longer be turned by hand.
- Pull the brake lever several times.
- Put the parking brake lever into the released position.
- The disc or the drum must be able to turn freely. If not, move the nut gradually until the disc or drum can turn freely.
- Refit the rear wheels (see 35A, Wheels and tyres, Wheel: Removal - Refitting, 35A-1).
READ NEXT:
 Clutch control: List and location of components
Slave cylinder supply pipe (engine compartment)
Left-hand drive slave cylinder supply pipe (engine compartment)
Master cylinder (engine compartment / passenger compartment connection)
Brake pipe
Clutch pedal switch: Removal - Refitting
JH3 or JR5 or TL4, and CRUISE CONTROL - JH3 or JR5 or TL4, and VEHICLE
WITH CARD
REMOVAL
I - REMOVAL PREPARATION OPERATION
Remove:
the driver side dashboard lower trim clips (1),
the driver si
Clutch circuit: Bleed
JH3 or JR5 or TL4
Bleed in the event of:
dead travel,
pedal at mid-travel,
pedal to the floor,
poor gear changing.
I - PRECAUTIONS DURING REPAIR
Risks relating to contamination.
The hydraulic c
SEE MORE:
Choosing a child/baby seat mounting
There are two ways of attaching child
seats: via the seat belt or using the
ISOFIX system.
Attachment via the seat belt
The seat belt must be adjusted to
ensure that it is effective in the event of
harsh braking or an impact.
Ensure that the strap paths indicated
by the child seat manufact
Dashboard wiring: Connector access
I - LOCATION OF CONNECTORS
R251 connector (dashboard wiring/radio + telephone
wiring connection).
R369 connector (dashboard wiring//multimedia wiring
connection).
R99 connector (dashboard wiring/heating wiring
connection).
R 173 connector (dashboard wiring/wiring for one-touch
steering
© 2016-2025 Copyright Renault Clio Owners Club
