Renault Clio: Passenger's frontal airbag: Removal - Refitting

IMPORTANT
Consult the safety and cleanliness advice and operation recommendations before carrying out any repair (see 88C, Air bag and Pretensioners, Airbag and pretensioners: Precautions for the repair, 88C-6).
REMOVAL
I - REMOVAL PREPARATION OPERATION
- The passenger airbag is mounted beneath the dashboard facing the front passenger.
IMPORTANT
It is essential to lock the airbag computer using the Diagnostic tool before starting the removal.
When this function is activated, all the trigger lines are inhibited and the airbag warning light on the instrument panel is continuously lit (with the ignition on). Locking the airbag computer also allows the electric steering column lock to be unlocked.
IMPORTANT
Handling pyrotechnic systems (airbags or pretensioners) near to a source of heat or flame is not permitted: there is a risk of triggering the airbags or pretensioners.
- Lock the airbag computer (see Fault finding - Replacement of components) (MR 394, 88C, Airbags and seat belt pretensioners).
- Disconnect the battery (see 80A, Battery, Battery: Removal - Refitting, 80A-1).
- Remove the dashboard (see Dashboard: Removal - Refitting) (MR 393, 57A, Interior equipment).
II - OPERATION FOR REMOVAL OF PART CONCERNED

- Remove the bolts (1) attaching the airbag module to the beam.

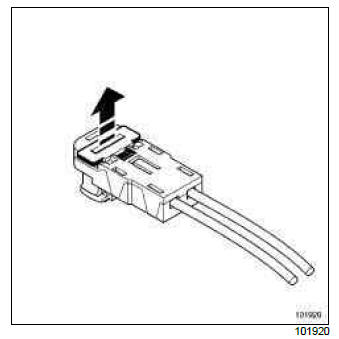
- Disconnect:
- the airbag module connectors by unclipping the safety devices,
- the earth terminal.

- Remove the bolts (2) attaching the airbag module to the support.
Note: The airbag has a connector which short circuits if it is disconnected to prevent accidental triggering.
Note: Depending on the vehicle's equipment level, the airbag module may be attached to the top of the dashboard with clips (entry level version).

- Move the airbag module support (3) to detach clips (4).
- Remove the support module.
REFITTING
I - REFITTING PREPARATION OPERATION
- Replace the parts required, (see 88C, Air bag and Pretensioners, Airbag and pretensioners: Precautions for the repair, 88C-6).
IMPORTANT
When the passenger airbag module is triggered, the consequent damage caused to the attachments always requires the dashboard to be replaced. Do not forget to affix the label forbidding the installation of a rear-facing child seat on the passenger seat to the side of the new dashboard.
II - REFITTING OPERATION FOR PART CONCERNED
IMPORTANT
Whenever the passenger airbag module is removed, it is essential to replace the nuts or bolts that hold the module to the dashboard with new ones.
- Torque tighten the airbag module mounting bolts (6 Nm).
III - FINAL OPERATION.
- Refit the dashboard (see Dashboard: Removal - Refitting) (MR 393, 57A, Interior equipment).
- Torque tighten the module mounting bolts on the pillar (8 Nm).
- Connect:
- the earth terminal,
- the airbag module connectors.
- Check that the connectors are locked correctly.
- Connect the battery (see 80A, Battery, Battery: Removal - Refitting, 80A-1).
IMPORTANT
Check the airbag computer using the Diagnostic tool. Any failure to follow these instructions may lead to system malfunctions, or even result in the incorrect triggering of the airbags.
- Unlock the airbag computer (see Fault finding - Replacement of components) (MR 394, 88C, Airbags and seat belt pretensioners).
IMPORTANT
Do not reuse the pyrotechnic components. The pretensioners or airbags on a vehicle which is to be scrapped must be destroyed.

